Saturday, July 24, 2004

Puh-puh-pleeeease don't throw me in that briar patch

 It is to be noted that when any part of this paper appears dull there is a design in it.

    ---Richard Steele (1672–1729), British dramatist, essayist, editor

It's now Fall of 2002, and I'm deeply in a burst of exploration and inspiration.  During this this period, I was exhalting in the discovery of wall-hanging sized quilts.  The first quilt I did in a smaller size was the Around the Twist Quilt I made at my first Henry Farm Inn quilting weekend.  That was followed by the two Braid quilts I made for my brother and the series of Block Bender quilts.  Small quilts allowed me to experiment with more styles without the huge time investment required to actually finish the quilt.  At this time, I still hadn't really embraced the concept that "finishing a quilt is highly overrated".

So what to try?  I'd been hearing somethings about paper piecing on Simply Quilts, so I thought perhaps that might be something to try out.  In addition to collection books and fabric, I was also collecting patterns that I thought might be interesting to work on "some day".  Starting a quilt is even more overrated than finishing .  My pattern queue contained several small project patterns by Caryl Bryer Fallert.  The first one I tackled was the Illusion Pattern.

This was fun, and was an interesting way to play with different color combinations.  Though, frankly, it was not a particularly challenging pattern to make!  However, because it was such an easy and quick thing to make, I actually made 4 of these.  One in rainbow colors using hand dyes (what a shock, no?), one primarily purple hand dyes (you don't HAVE to use all of the colors?), and one using a Cracked Ice fat quarter collection I had picked up, and one I prefer not to take about (and definitely won't show!).  Not all color combinations work out.  Someday I may chose to challenge myself to design a quilt primarily in purple and green, the illusion quilt really didn't work out with that combo.  That's what happens when you're making a quilt away from home using only fabrics you happen to have on hand.  Sometimes it works, sometimes it doesn't.

As a first paper piecing project, I was quite pleased with the results, and became open to using paper piecing in the future for my own designs. 

One other BryerPatch design I made was the Flying Geese in a Curve pattern.  This was more of a sample project to teach the techniques rather than a full sized pattern.  This was the first time I had worked with curves, and I was very pleased with the results.  I haven't done too much with curves yet, but curved quilts are in my short term plans for designs. 

The thing resulting from this effort was a very happy Christmas.  By Thanksgiving, I had an interesting assortment of small quilt tops on hand.  I declared a hiatus on starting new quilts, and set to work finishing up the tops I had on hand and gave most of them away as Christmas presents.


Friday, July 23, 2004

On a Bender....

     Anything I've ever done that ultimately was worthwhile... initially scared me to death.
        -- Betty Bender

I'm not sure who Betty Bender was, but this sums up the problems a lot of quilters have with trying something new.  New stuff is outside your comfort zone, the place where you feel comfortable and confident.  The new is scary, and by definition, unknown. 

Whenever I find myself hesitant to try something new, I play a little game with myself.  Think of something you are very good at today, right now.  It doesn't have to be at all related, it just has to be something you enjoy doing, and can do well.  For example, I enjoy walking.  Pretty simple, do it all the time...yet at one point in my life all I could do was crawl.  And I had to work my way up to that point!  One day, I decide to take my first step, then the second.  Now I don't even bother to own a car and spend 90+ a day walking.  Once I was hopeless, then I tried it out, and eventually, could do it without even thinking. 

Ok, so what's the point of all of this?  Well, for some time now, I'd been collecting quilting books, many purchased off of eBay.  Many of the books contained ideas that caught my eye, but required me to set off in new directions to do.  One book was a particularly good inspiration, Margaret Miller's Block Benders. 

This book is unfortunately out of print (but I've got a copy...bwah ha ha!!!!!!!!!).  I loved the optical illusion of creating curves using only straight lines.  I loved the lack of an evenly spaced grid, and was mentally playing with ideas on how I might make a quilt in this style.  Margaret uses pencil and paper to plan out her quilts, but I'm a computer geek!  We don't need no stinkin' pencils!

I started playing around with QuiltPro, but couldn't really figure out how to make a quilt in that style.  Then I started playing around with Electric Quilt (version 4 in those days), and again, I couldn't figure out how to do.  Eventually, I purchased the book EQ4 Magic, which showed out to create an irregular grid layout using the Custom Set feature (EQ5 name....I think it was called something else in EQ4).  I was off to the races!

I played around with a simple design for my first attempt.  You know, rainbow colors, black background....don't want to step TOO far outside of my comfort zone .  I created a set of templates for cutting these blocks by printing out templates from EQ4, then cutting them out from template plastic. 

Important tip:  Never accidentally set an iron on top of a plastic template.  You know those little punch out things they sell kids that shrivel up and shrink when placed in an oven?  Same principle!

I cut all of the pieces out, and took them with me to Connecticut to visit my friends Ken and Cindy.  We had something of a quilting weekend on that trip, visiting lots of fabric stores and generally spending a lot of time in the basement sewing.  The border strip around the main layout was snagged from Cindy's fabric stash.  It's sort of interesting how fabric stashes grow.  I have a fabric stash, Cindy has a fabric stash, and Ken has a fabric stash, and they are all completely different in character.  It was actually hard finding a fabric from Cindy's stash that enhanced my jewel-tone fabric selections.  I think the one we grabbed worked very well.

That one was sort of fun.  The "bi-rangles" were a bit difficult to sew together, particularly the "long and skinnies".  for these quilts, it can be difficult to get the diagonals to hit right at the quarter inch seam allowance properly.  Mostly a matter of practice.  I highly recommend using "fabric tabs" to start and end sewing on these blocks, and a single hole needle plate is also a good idea.  It can be difficult to start sewing some of these, because the skinny point can get pulled down into the hold.

Short aside:  At a quilt workshop at the Henry Farm Inn, Deb Tucker dubbed these fabric tabs "dingleberries".  How can I phrase this delicately?  A dingleberry is a little bit of dangling excrement on a dogs rear end after it finishes going to the bathroom.  The term sort of captures the idea of the fabric tabs .

Gee, that was fun, and pretty easy to do....but it didn't really use many fabrics!  Let's try again, but with gusto!  This time I used 4 quadrants like the first, but used bands of color like I did with the wedding quilt, squeezing the color toward the middle.  For the layout, I alternated bands, starting in to corners, and progressing to the other side.  The progressions met in the middle, in the "green phase". 

Since the two middle bands ended up the same color, I used dark values and lighter values to separate them, and gave them a little twist so they crossed over.  I spent a lot of time shopping for green fabrics for this one, so I've have enough shades to choose from!

This quilt was given to my friend Marcia, and hangs in their bedroom today.

Ok, during this phase, I'd been really expanding my fabric stash in new directions.  One new found love was hand dyed fabrics.  I had picked up a nice assortment of color wheel progression hand dyes, and was dyeing to use it.  I had also wanted to do something with black-and-white fabrics, and had been buying those for a while too.  I stepped up to the next block bender EQ5 design I had created, and was off to the races.  This is the result, which has a completely different look from the last one, even though it is precisely the same piecing design!

I had one more Block Bender in the planning stages, but this one deserves an entry of its own.


Thursday, July 22, 2004

Braids, Barn Windows, and Buster the Cat

I've sort of reached the point where the chronology of quilts starts overlapping a bit, so things are no longer going in strict order.  Sometimes the important event is the completion of a quilt, sometimes the beginning is most significant.  I'll focus on the story behind each one, which may jump to the past, and have an occasional bit of time travel into the future!

I mentioned in another entry that I experienced a quilting hiatus between the completion of my nephew's wedding present and my first Henry Farm workshop.  Well, while I was actually sewing any quilts, I certainly was THINKING about sewing some quilts.  Around Christmas of that year (2001), I mentioned to my sister-in-law that I was having problems getting inspired to work on something new, and that perhaps what I needed was an identified purpose for a quilt.  Would they maybe like a wall hanging size quilt to hang in the house?  Jeannette had a better idea.  They have been working for years on fixing up a barn on a piece of property in Pennsylvania with the goal of making it into a retirement home.  Jeannette thought it might be nice to have a couple of quilts that could be turned into window coverings to cover some of the barn windows when they were away, and rolled up out of the way when they were at the barn.  Sounded like a good idea, and I already had an idea for the quilt I would like to do.

I've mentioned before that I had found eBay to be an excellent source to build up fabric staches.  It also proved an excellent way to build up a Quilting library.  I had purchased a wide variety of quilting books during this time for different types of quilts I thought I might like to make.  I should mention, if you are working on building up a quilting library, it is a good idea to keep of list of the books that you already own.  My friends have added quite a few books to their own libraries because of duplicate purchases on my part!

On book in particular caught my attention:  Braids and Chevrons Updated, by Camille Remme.  I just loved the look of these quilts.  They stepped outside of the normal rows of blocks format used by many quilt designs, and I wanted to give it a shot.  And guess what, I was going to use the entire rainbow, and set it in a black background

 
    As the old proverb says "Like readily consorts with like."
                   Cicero (106 BC - 43 BC)

Now began a fun task.  The wedding quilt used a rainbow of colors, but only 2 fabrics in each major color grouping.  The whale quilt also used something approaching a color wheel, but only as an accent, and only a single fabric for each color.  For the braid quilt, I had something more ambitious in mind.  I turned to my fabric stack, and started sorting.  I first sorted the fabrics into 6 stacks, one for each of the primary and secondary colors.  I then sorted out the "tweener" colors that really fell between two of the colors.  In theory, this would have given me 12 stacks of colors, but I had so many colors in the "green-to-blue" and the "orange-to-yellow" transition range that I created two groupings of those colors, giving me a total 14 stacks. 

A strip was cut from each of the fabrics, and then chopped into 6" inch strips.  The braids were sewn by working my way around the color wheel, selecting 4 strips from each color grouping as I went.  Each new braid was started by shifting the stack used for the first strips by two groups.  When successive braids were placed next to each other, it created a diagonal progression of color. 

 
    A discovery is said to be an accident meeting a prepared mind.
             Albert von Szent-Gyorgyi (1893 - 1986)

I was making two quilts for this project.  One was mostly square, while the other was wide and short.  Four braids with sashings was wide enough to cover the first window, so I sewed those braids first.  I needed seven braids for the wide quilt, and by the time I got to the second quilt, I had gotten quite comfortable with the process of sewing the braids.  Too comfortable, as it turned out.  When I placed the second braid next to the first, I discovered I had somehow reversed direction around the stacks of strips, causing the colors to run the wrong way.  Shazbot! 

I was a bit puzzled at first, not really understanding what I had done wrong.  However, when I flipped the braid around to line the colors up, I discovered I liked the look caused by the chevrons pointing in alternating directions.  A happy accident, indeed!

To quilt these two quilts, I had a new toy to play with.  I had just purchased a new HandiQuilter frame, and was anxious to try it out.  I have a couple of observations to make about frames such as this:  A)  the results depend on the overall skill and dexterity of the operator, and B)  these are not really good at doing straight lines!  In this case, I'd describe the results as "servicable" rather than "artistic".  It proved quite difficult (at least for me!) to do stitch-in-the-ditch quilting on the HandiQuilter frame.  Also, I found it very difficult to move the machine and operate the foot pedal while standing or sitting on a barstool.  My back ached for weeks after this.  I found a pair of Handi-Handles to be a very good investment for this frame.  It gave me better control over the movement of the machine, and also better speed control.  It also saved me a lot of back pain!

Ok, so where does Buster the Cat come in?  I gave these quilts to Terry and Jeannette at Christmas of 2002.  Jeannette had them laid out on the living room couch, by a window to people could admire them.  Buster decided that the nice sunny spot on one of the quilts looked like a nice inviting spot to take a nap.  I happened to have my camera with me, and snapped one of the best photographs I've ever taken.  This has been the desktop background on all of my computers for years now.

It's a good day to dye....

Every once in a while, I find the need to climb up on a soapbox and vent a little steam.  In addition to quilting, I also dabble in hand dyeing a little.  I love the process, and playing with the colors and the possibilities of mixing the various dyes.  One thing that has really annoyed me about dyers and dyeing has been the lack of publicly available information about how to achieve certain colors by mixing dyes.  The normal explanation given is that it won't do any good to give you the information since you won't be able to exactly reproduce the process I used and achieve the same result.  Therefore, I'm going to make you just figure it out yourself. 

Today I encountered a site where somebody actually posted a chart explaining how they mixed dyes to achieve certain colors.  This is wonderful...it not only gives recipes for colors, but also common names for the colors so if somebody tells me they'd like me to dye something maroon, I've got a pretty good place to start.  I shared this information on the Discussion Forum for a hand dyeing class I'm taking at quilt university.  Here's the response from the instructor:

 
"Pooey, Rick in Boston!!!! Spoiler!!!!!
Often, students ask me to help them find colors and I am happy to do so BUT....I give them hints so that they can find the colors for themselves. I act as the guide but the journey toward the actual recipe is invaluable!

Along the way, you find fabulous new colors and ideas hit you that you would have missed if following down the center of an already paved highway. You learn so much more about mixing and color theory and actually how dyes work when you work for it. For instance there are some recipes that look hideous and way wrong during the first 5 minutes but that's because the red or the yellow need a bit more time to kick in...usually at about the 10 minute mark they are better, and at 1 hour, great things are starting to take place. How to take advantage of that starts spinning in your head.....

Learning how to hand dye is all about process, process, process!! So much revolves around experience and experimentation. I cannot teach that. It comes from hours of testing and hard work. Making it your own is what will teach you the most about this art form. What's you hurry, Murry??

I say all that to say this-you can take short cuts but remember what happened to the Donner Party. (An illustration from California's pioneer history.) How's that for pouring cold water on a hot find, Rick? LOL! "

I frankly, find this to be very obnoxious.  Yes, it is a process.  Yes, there are no hard and fast formulas.  But that is no reason to deny basic information that allows one to get closer to a target faster. 

 "We are like dwarfs sitting on the shoulders of giants. We see more, and things that are more distant, than they did, not because our sight is superior or because we are taller than they, but because they raise us up, and by their great stature add to ours."

            -- Sir Isaac Newton

Wednesday, July 21, 2004

Let's twist again, like we did last summer...

Previously, on Stargate SG-1...

Let's see, where did we leave off.  First I pushed to finish the whale quit.  That only took 3-4 years.  Then I pushed to finish the quilt for Alex's wedding.  The wedding was a lot of fun, the hilight being the time I over heard my sister-in-law pointing to me out to somebody with the phrase "my SINGLE brother-in-law"

After finishing the wedding quilt, I pretty much lost interest in quilting for a while.  Meanwhile, my friend Ken took a quilting class and got hooked...then his wife Cindy starting making quilts to...and putting together the requisite fabric stash.  Meanwhile, even though I wasn't actually making any quilts, I was busy enlarging my fabric stash, searching around for even more sealife fabrics, particularly whales and dolphins.  Again eBay proved to be an invaluable resource, both for sea life fabrics and fat quarter assortments to expand my basic fabric stash.  I had definitely reached the pointer where quilting and shopping for fabrics were activities that were only loosely connected!

Fast forward to Christmas. I was getting ready to hop on a train for my brother Terry's place for Christmas, when I received a phone call from Cindy.  They were staying at a bed-and-breakfast in Vermont on a skiing package, and had noticed a flier about the quilt weekend packages the Inn was offering.  There were still 3 spots opened, and she wanted to know if I wanted to sign up.  Sure, why not?!?!?!?

Well, to start with some minor logistical problems...such as how do I get up there in the first place?  I'm a downtown city dweller, living the car-free lifestyle.  It's great...I live walking distance from work, I don't spend half my life stuck in traffic, and Boston in general is a very walker-friendly city.  However, every once in a while, I find myself in a situation where a car would be nice.  This was one. 

Fortunately, bus companies exist for this purpose, and there is a bus that runs to Bellows Fall, VT, which is pretty close to Chester, VT where the Henry Farm Inn is located.  Paul Dexter, the inn owner, even offered to pick me up at the bus station in Bellows Falls.  I could already tell this was going to be a nice weekend.

Next came the question of what to take with me, given the hassles of transporting things on the bus.  At the time, I didn't own any kind of a carrier for my sewing machine, so that was one problem.  The instructor, Deb Tucker, was able to rent me a machine...ok, that's out of the way.   For other "big ticket" items, I just piggy backed off of Ken and Cindy.  Right, we're off!

So, this is what, now 2002.  I've been quilting since 1986 (more or less), and this is the first class I've ever taken on this.  To this point, my only instructor has been my friend Marcia (who tries to claim I'm overstating her role in making me a quilter) and books I picked up on my own.  I believe I've already mentioned that I had discovered eBay.  Did I mention that you can find quilt books for sale on eBay too?  I probably didn't mention that I had started buying lots of quilt books off of eBay, enough to create a rather sizeable library.  These books will start to play a larger role later in the story.

Man, this class was a blast!  The pattern we worked on was Around the Twist, a relatively traditional pattern.  Of course, I could not actually do this in a traditional style, basing mine off of some sealife pattern fabrics I had picked up (I suspect I've already mentioned eBay ).  Note also that my new found friends the Moda Marbles made a repeat appearance....don't mess with a good thing!  This was also my first wall-hanging size quilt.  I made the decision to go with something smaller because I didn't want to repeat what I'd just been through with my last 3 quilts...2 queen size, 1 king size.

This class also established another characteristic of my quilting style....I'm unable to make something in a traditional manner.  I always want to find a way to add my own unique twist (no pun intended here) to the design.  I think this is one reason why I've never done quilt kits.  Why do the same quilt that somebody has already done.  The design and decision making process is a huge part of the fun of quilting.

Anyway, back to Vermont.  Only Ken and Cindy signed up for the quilting workshop, and the girls were just along for the ride.  Emerald, at this point, was exhausted from her busy high-school teenager schedule, and largely slept, read, and relaxed for the weekend.  Azureen, though, spent the weekend hanging around with the quilters and "helping" Dad work on his.  Deb Tucker was very nice to her, and set her up with another of her sewing machines for Az to use.  Az was given a Bernina 1090QE, while the machine I was renting was a very old basic Singer!  Sometimes life is not fair!

In the class, I only got as far as finishing the top, the quilting was done when I got home.  It's not terribly evident from the photo, but the quilting is done in a trapunto style.  The large fish on the background fabric are stuffed and raised.  This was done using the machine trapunto style with water soluble thread.  It was not a difficult process at all, but it didn't turn out as nicely as I could have hoped.  The trapunto in this case was swamped out by the background noise of the fabric.  I also used a simple cotton batting for the stuffing.  I probably should have gotten a polyester fat bat instead.

The trapunto resulted from a new addition to my quilting tool set...a Tivo box.  With a Tivo box, I can record the two daily episodes of Simply Quilts on the HGTV network.  This has proved an endless source of  quilting inspiration and instruction.  I've even been saving the episodes to video tape, and refer to them frequently when I need a refresher on how to do a particular technique.

After returning from this class (held in May), I didn't do any more quilting until immediately after Labor Day...but there was a pressure building up inside me that was going to be released in a big way!

Tuesday, July 20, 2004

Having a whale of a time...

Working on the butterflies quilt reawaked my interest in quilting.  At this point, I turned to a couple of UFOs I had stored away in a closet.  I had started these several years earlier after I had made a quilt with horses for my then 8-year old Godchild Azureen.  While shopping for supplies for that quilt, I had found 5 different fabrics featuring either whale or dolphin themes.  I have loved whales and dolphins for years, and have a pretty good collection of whale and dolphin artwork, so this seemed like a natural for me to make.  My friend Janet (the originator of the "Quilt Nerd" label) is also nuts about dolphins, so I set out to make a pair of quilts.  The quilt for Janet was queen sized, and I was making a king size one for myself.
 
These quilts were again a fairly simple design, essentially the same layout I used for Butterflies.  The purpose here was to feature the whales and dolphins in the panels.  I think I must have spent 2 hours in the fabric shop trying to find the perfect fabrics to use as the sashing strips and snowball corners.  I was absolutely obsessed with finding something that worked perfectly with 5 very different panel fabrics.  I actually got both tops pieced together, and wasn't really happy with how they came out...as a result, they had been sitting in the closet for 3 years waiting for me to get enough inspiration to finally finish them.
 
Well, in those days, I naively believed one needed to finish one quilt project before starting on the next one.   So I dragged these out of the closet and set off to finish these.  I worked on Janet's quilt first, since I had foolished mentioned once I was going to make her one.  It had been a running joke for Janet to ask when I was going to finish her "birthday present" or "Christmas present".  I actually resolved to have it finished by Christmas of that year. 
 
I actually made that goal, and presented the quilt to Janet at their Christmas party that year.  She was thrilled, and many people of commented and admired that quilt over year...except for me.  To my eyes, it just wasn't working, and I really wasn't sure why.  I still had the king size one there begging to be finished, and I really wanted to finish it.
 
     And the Grinch, with his grinch-feet ice-cold in the snow,
     Stood puzzling and puzzling: "How could it be so?
     It came without ribbons! It came without tags!"
     It came without packages, boxes or bags!"
     And he puzzled three hours, `till his puzzler was sore.

And I puzzled, and puzzled just a little bit more.  Eventually, I realized that my problem was with my carefully selected sashing and snowball pieces.  There was no oomph, or zing.  They just sat there and did nothing.  They were so accommodating to all of the panels that they added nothing to the quilt at all. 
 
Well, there was only one thing to do...I embarked on the mother of all reverse sewing jobs.  I took my seam ripper and completely dissassembled this king sized-top!  If you think it takes a long time to sew a king size quilt, try unsewing one some time .
 
During this process, I also spent some time shopping for more whale and dolphin fabrics, deciding I wanted to expand on the possibilities a bit.  I shopped everywhere, and around this time discovered online fabric shopping, since the one good fabric store in Boston had closed.  Particular favorites were eQuilter.com, Bighorn Quilts, and Craft Connection.  I also discovered eBay as a good source of fabrics.  I was buying fabrics, and still had no idea what kind of quilt I was going to make!
 
At about this time, I also took my first steps toward "Quilt Nerd".  I purchased QuiltPro 3 and started playing around with quilt designs.  I scanned in each of the whale and dolphin fabrics, and started playing around with different layouts.  I finally had one of those "aha" moments when I realized that didn't need to use the same colors around every block.  At that point, I really started to have fun, playing around with many different layouts for the blocks in Quilt Pro. 
 
The final piece of the puzzle was my discovery of Moda Marble fabrics.  These were a revelation to me.  Fabrics with pure vivid colors rather than the greyed tones used in many traditional quilting fabrics.  The entire rainbow of color opened up in front of me.  The use of rainbow colors has almost become one of my trademarks...I really like using "all of the colors" when I work on a quilt.  This quilt also was my first use of black as a background fabrics, another thing that finds its way into lots of my quilts. 
 
So here is the result, which occupies a proud space on my bed.  This quilt had a deadline of its own, as my nephew Alex was getting married, and I had plans to make a quilt for his wedding...remember my earlier statement about needing to finish one thing before starting the next one!  Notice that a couple of elements of the whale quilt have made their way into this quilt...the use of the rainbow and the black background in the border.  The Whale Quilt certainly represents the beginnings of my personal quilting style.


Monday, July 19, 2004

Little Girls, Like Butterflies, Need No Excuse...

This quilt is a very special one to me.  Not because it is a particularly challenging quilt, but because of the history behind it's creation.  The history goes all the way back to the very first quilt I ever made.  Back in 1986, I complained to my friend Marcia about being unable to even do my own clothing repairs because I had never learned how to sew.  Marcia graciously volunteere to teach me how to sew, and she decided to teach me by having me help make make a baby blanket for the first-born child of our friends Ken and Cindy.  I don't have any pictures of the blanket, but here is a pattern I threw together in Electric Quilt.
 
Marcia and I ended up becoming the Godparents for a little girl, named Emerald.  Marcia, rather unfortunately, had to have major surgery at the time of Emerald's birth, and was unable to help finish the blanket.  I bought an inexpensive Sears Kenmore sewing machine, and worked to finish the blanket.
 
The pattern we were working from had a picture of this baby blanket hanging on the wall over a crib, and that was the image I had for how it would be used.  When I mentioned this to Marcia, she informed me that "I didn't understand."  Well, she was right.  Emerald carried that blanket everywhere for years.  When it was lovingly retired, it was threadbare, filled with holes, and the batting had collapsed to one end because Emerald had picked out all of the ties over the years.  The blanket is now lovingly retired in a vacuum bag, having well earned its rest.
 
Two-and-a-half years, after Emerald's birth, Cindy gave birth to a second daughter named Azureen.  I am also Azureen's Godparent, and made her a baby blanket also.  So Emerald wouldn't get jealous, I made her a "big girl" blanket for her bed, done in a simple "whale block" pattern.  Shortly after Emerald's 5th birthday, the family moved to Japan, and then Singapore, where they were to remain until Emerald turned 11.
 
Fast forward to 1999.  I am visiting with them, now located in CT, and Emerald comes walking in to the room carrying the whale quilt I had made her when she was young and laid an "Uncle Rick, notice how worn this quilt is getting" on me.  The girl definitely knows how to push the "uncle buttons"  
 
I asked her if she would like to help make the quilt, and her eyes lit up.  We made a trip to the quilt shop that afternoon and I let her pickout the fabric.  At that point, we were sort of making plans on them coming up to Boston some weekend to work on it.  Well, somehow the stars must have been in incredible alignment, because about a month later, Marcia (now living in Omaha), had a business trip to Connecticutt.  She stayed over a few extra days, and the entire crew came up to Boston to work on the quilt.  We had sort of come full circle!
 
This was a blast.  This was the first quilt I had done in several years, and both girls jumped in worked on the sewing.  We really needed a second sewing machine, as both wanted to sew.  As a result of this weekend, Ken, Cindy, and both girls ended up being quilters.  Equally as important, it got me quilting again.  All of the quilts I've done over the last 4 years have been the result of that one weekend.  Never underestimate the importance of "quilt buddies" to keep the inspiration going!

Sunday, July 18, 2004

Every quilt has a story.

I got a complaint once that I should try writing up some information about each of the quilts that I've posted pictures of on my website.  Well, this blog seems like a good mechanism, so over the next few days I'm going to try to write up the stories behind each of the quilts I've made.
 
Alex Wedding Quilt is, I believe, the oldest quilt I have a photo for on the website.  This was made about 4 years ago, and in many ways, represented the starting point in developing my own personal quilting style.  This quilt was based on a quilt I saw in the JR Homestead Quilt Shop in Bethel, CT.  This quilt was a raffle prize, and was quilted with concentric circles in each block.  I thought the quilt was quite intriguing, but was a bit disappointed to learn it was done with special guides on a longarm machine, and would be difficult to reproduce as well on a home machine.
 
Anyway, what really fascinated me was the use of the bands of color traveling across the quilt.  At the time, I was in the midst of some revelations on quilt color, and had just picked up Jinny Beyer's Color Confidence for Quilter's book as a learning aid.  To make up the quilt, I turned to Jinny Beyer again, and ordered a bunch of fabric from her RJR Basics line for the colors.  At the time, I was not real confident in my own fabric selections, so I decided to lean on the expert.  In general, I was pretty happy with my fabric choices, although the RJR Basics fabrics are a little on the grey side for my current tastes.  I'm also not real happy with the light green square in the corner.  It ended up too light to blend in to the sequence well.  Now, I would fix a problem like that by just grabbing something else from my fabric stash.  Back then, I didn't have a fabric stash yet, and the only downtown Boston fabric store with any selection had just closed, so I just went with what I had picked.
 
The quilting alternated between an on-point diamond design and a Celtic cross.  The diamond design was easy, and only use a walking foot.  The Celtic cross was interlocking rings, and was a bit more complicated than anything I'd ever attempted.  I used a technique my friend Marcia taught me, and Quilted over tracing paper with the design punctured into the sheets using the sewing machine.  This worked ok, but I don't have really great control over my machine when it comes to freehand quilting, and it took FOREVER to pick out the little pieces of paper from the tracing pattern!
 
While we're on Alex, here's a baby blanket I made last year for Alex and Lynn's son Isadore.  This was one of the easier quilts I've ever done.  This is a faux-chenille style quilt created by stacking 3 identical flannel panels and sewing diagonals back and forth across the top, batting, and backing all in one step (using a walking foot). 
The top two layers were then cut using a slash cutter to create the chenille effect.  Not counting the binding, I had this whole thing done in less than 2 hours.  The hardest part of the process was finding any flannel panels to use.  There are really not a lot of examples out there. 
 
This quilt was inspired by similar quilts I saw at the Bernina World quilt shop in Raleigh, NC.  The examples they had in the shop did not use flannel, but regular cotton panels.  While they were very soft on the surface, I decided I wanted to use flannel for the baby blanket, so I began my search.  I believe I found these panels at Bighorn Quilts.


Saturday, July 17, 2004

Computer Assisted Landscape Quilts

Last year, I signed up for the On Land and Sea landscape quilt class at QuiltUniversity.com taught by Susan Brittenham.  Susan's process for creating landscape quilts involves creating a tracing from a photograph to find the major image edges, and enlarging the tracing using either a grid method or projection method.  The enlarged image is then retraced on to freezer paper to create templates for the individual pieces. 
 
This works well, but seemed a bit tedious to me, and since I'm somewhat manually challenged, I also found it to be a bit frustrating.  And I'll be frank, I use a pen or pencil so infrequently these days, that my hands quickly cramped up any time I did the tracings.
 
Ok, I'm a quilt nerd, so let's see what sort of technology I can throw at the problem.  The first step, of course, is to scan the photo into the computer...in this case I didn't have a digital photo to start from.  Photos on paper, how quaint .
 
The next step is to turn to some photo editting software.  For this task, I used Adobe Photoshop Elements as an editor.  This worked rather well, having all of the tools I needed for the job.  The editting process went through the following steps:
 

  1. Edit the photo with Elements.  Ok, no rocket science here.
  2. We're going to doing this process using multiple layers in the image.  So the first step we need is to create a second layer with a copy of the original photo.  To do this, select the menu item "Layer->Duplicate Layer".  You can accept the default name, or give it a more meaningful name.  I using call this "Edge Layer".
  3. Now we want to take advantage of the Elements graphics filters to jump start the tracing process for us.  When I first did this, I used the "Filter->Stylize->Edge Detect" filter to transform this into a tracing of the image edges.  Since then, I've poked around a little more and found "Filter->Sketch->Photocopy", which does sort of a black and white photocopy process on the picture.  This produces results much like Edge detect, but it has a couple of settings you can play with that can produce a more usable tracing of the image.
  4. Right now, all you can see is the traced image, which is all black and white.  It would also be helpful to be able so see some of the underlying color.  If you click on the Layer tab in the upper right corner, you can make the tracing layer partially transparent, so you can see some of the details of the original image.
  5. Ok, now let's create a layer to use for our pattern tracing.  Click on the menu item "Layer->New->Layer", and create a new image layer called "Pattern".  We're going to use the drawing tools to trace the major lines of the underlying image to create a pattern.
  6. To trace the image, select the Pencil tool from the drawing tools palette.  For the purposes of creating a pattern, a bolder line is preferred, so I recommend changing the pen size to 3 or 5 pts to create a bolder line.  Ok, use this pen to trace along the major lines of the drawing to create your line drawing.  Don't try to trace all of the edges created by the filter, you need to be a little more selective in deciding the major elements of the drawing.  Being able to see the original image using transparency helps a log.
  7. A couple of things to keep in mind:  1)  at any point, you can zoom the image to make it easier to trace a particular line.  2)  Don't be too anal!  You don't need to trace every line, nor do you need to trace every little dip and turn.  That level of detail will be lost when translated into fabric anyway.  Finer details can be created using the fabric choices, quilting, and other embellishments if you need to.  3)  I find tracing using the mouse to be difficult, so I picked up an inexpensive graphics tablet.  Wacom makes some nice, inexpensive tablets that allow you to use a pen for the tracing.   I found that to work better than a mouse, despite the aforementioned hand cramping problems .

Ok, I have an image, now what.  Well, we want to save this as a usable pattern.  Save what you've created first as a .PSD file so you keep all of the layers.  Now we want to create a .jpg file containing just the traced pattern you created.  This takes a couple of steps:

  1. Click on the "Layers" tab, and select the Background layer.  Select "Layer->Delete Layer".  Repeat for the "Edge Layer".
  2. At this point, we have just a pattern left, but the background has become an annoying checkerboard.  Select "Layer->New->Layer From Background" to create a new background layer. 
  3. Select "File->Save As".  This time we're saving this as a .jpg image rather than an Adobe .psd file, so make sure you change the Format item to JPEG for the save.  This will create a .jpg image containing just the tracing information. 

You now have an image containing a tracing of y0ur starting photograph, but this is not really in a usable form yet.  The next task is to get this sized to the size quilt you want to make.  It took a bit of looking around, but I found a nice program for this called Poster7.  Poster7 allows you to print out an image in any size, using multiple sheets of paper that you can then tape together to make a poster.  I find it handy to print directly on to freezer paper.  NOTE:  only do this if you have an ink jet printer.  DO NOT PRINT ON FREEZER PAPER WITH LASER PRINTER.  You can damage a laser printer if you try this, because laser printers use heat to set the toner on to the paper, and the heating elements will melt the plastic of the freezer paper.

The first time I tried this, I cut sheets of freezer paper from a roll and fed them into the printer.  I have a wide format printer, so I was able to cut larger sheets to use.  The curl from the rolling process was a bit of a pain, but it did work.  You can also buy freezer paper precut for printers, including a 12"x15" size.

IMPORTANT NOTE:   When you are printing on freezer paper, you are printing on the non-plastic side.  If you just print that way, you'll end up with a mirror image of the original photograph.  You may want to reedit the pattern .jpg file in Abode Elements and create a mirror image first.  When you print it out, the pattern will be drawn on the correct part of the freezer paper.

Ok, now print the pattern out on freezer paper, cut your templates, and you're off to the races.  Susan Brittenham recommends creating a master copy of the pattern to use for aligning the pieces once you've used the templates to cut the fabric pieces.  I found it useful to make the master from the layered original .psd file, printed to the same poster size on normal paper.  Since I created this with partially transparent layers, this master helps with both alignment and fabric selection, since I can see the colors from the original image too.  You might want to make the Edge Layer image transparent before printing, so you can see the full color of the poster.


Creating Diamonds with EQ5 Custom Set

A friend read my previous blog entry on creating triangular blocks in EQ5 and declared me a real "quilting nerd". Well, I guess that description fits me pretty well, since I do sort of take the nerd's
approach to doing some of this. Wait until she reads this entry!

In today's "issue", I want to focus on how to create diamond shaped blocks using EQ5 Custom Set. EQ5 Custom Set quilts are very handy, allowing you to create build quilts that don't necessarily
conform to standard layout styles. Additionally, the quilts you create can be used like quilts from the EQ Layout Library....you can set different blocks into the layout to play with the variation.

The process of creating a diamond shape block is is fairly easy in theory. To do this, create a Custom Set quilt. Before starting, make sure you have the Graph Pad turned on. To turn it on, use the View menu, and make sure there is a check box next to the Graph Pad entry.

Using the Plain Block tool, use shift-drag to set a plan block onto the quilt. At this point, it doesn't matter where....just pick a convenient place for it. Now use the graph pad to adjust the height and width to be a proper square. Don't forget that you need to select the block using the adjust tool to enable the graph
pad.

Now we need to rotate the block so that it is positioned on-point. This needs to be done with the graph pad again. In the graph pad rotation field, change the angle from "0" to "45".

Now that the block has rotated, resizing the block will distort it into a diamond. Using the mouse, grab the resizing handle on the top of the block and drag it upward. Voila, it is now a diamond!  Note that you need to resize this block by dragging it....if you change the size in the GraphPad you only change the size
of the square.

Ok, that's the easy part. Things get harder if you A) want a precise 60- or 45-degree diamond, or B) want the edge of the diamond to be a particular size. Unfortunately, EQ5 doesn't have any tools that will help you with this process, so a bit of manipulation and a handheld calculator is required. Ok, I actually use the Calculator program that comes with Windows, but the principle is the same.

Bear with me, as I'm about to describe the mathematical basis for this first, since I want to record how this works so I don't forget it like the last time .

Anyway, the critical step of this process will be the starting size of the square. When the square has been set on the quilt and rotated 45-degrees, the length of the square sides remain the same, but the size of box that encloses the block is now size of the diagonal dimension of the square. For example, if we start with a square
4"x4", after rotation, the block's size is now 5.64"x5.64". The mathematical relationship is fairly simple. In a square, the length of the diagonal is the length of side times the square root of 2...ugh, more math. Ok, forget mentioned square roots, and just remember the number 1.41. Another one of those magic
numbers.   1.41 IS the square root of two, so to find the length of a squares diagonal, you just multiply the size of the square by 1.41.  So the diagonal of a 4" square is 5.64".  The diagonal of a 5" square is 7.05", a 6" square is 8.46".  If you end up doing this a lot, you might want to make a small table with the values for common block sizes.

Let's tackle the 60-degree diamond first, since that is a little easier of the two standard cases to deal with.  When you stretch the block into a diamond shape, the GraphPad height and width numbers change to reflect the edge lengths of the diamonds. To create a diamond with 6" edges, you stretch until the Graph Pad numbers read "6.000". Using the mouse, you will rairly be able to get exactly to your target number, so accept the the closest value you can get. DO NOT use the Graph Pad to adjust the numbers to the target. Resizing with the Graph Pad at this point will skew the shape of the diamond.

Ok, at this point, we have a diamond with 6-inch edges, but unless you were extremely lucky, this diamond is ot a 60-degree diamond with 6-inch edges. The trick to getting a 60-degree diamond is carefully chosing the size of the original square at the start of the process.

How do we pick the size? A 60-degree diamond has a handy property. Since these diamonds consist of a pair of equilateral triangles, a proper 60-degree triangle will be the same length across the points of the diamond as the length of the edges. So, to create a 60-degree diamond with 6" sides, we need to use a starting square that measures 6" across the diagonal. See, there was a purpose to the previous discussion about the square
root of 2 and the 1.41 magic number . So to create a 6" 60-degree diamond, you use a starting square size of 6 divided by 1.41, or 4.255 inches. For practical purposes, 4.25 will work just fine.

If you resize your block to 4.25x4.25 inches, rotate by 45 degrees and stretch until the Graph Pad reads 6 inches (or close to 6 inches), you will end up with a correctly sized 60-degree diamond. Note that
the angle shown in the Graph Pad rotation field now reads 60 rather than the starting 45 degrees. Frankly, I have no idea what that means at this point, but you can treat this as another "magic number"
to double check that you have sized this correctly. If you make two copies of this block, and change the rotations to 0 and 120 degrees, you now have the elements you need to build a 6-pointed star
from these diamonds. You can also rearrange these to create a cube for a tumbling block design.

Ok, deep breath...now we tackle the 45 degree diamond. The process is largely the same, but selecting the starting size is a little more complicated. In the end though, it boils down to a single "magic number" again.

In a 45-degree diamond with 6" sides, what is the length across diamond? This required me to reactivate some long dormant brain cells to relearn a little trigonometry, but in the end, the calculations were pretty simple.

If you draw a line from the narrow point of the diamond to the midpoint of the base, you create a pair of right triangles with angles of 22.5, 67.5, and 90 degrees. The length of the base can be calculated by
multiplying the edge length by cos(67.5). No need to use a scientific calculator, just use the value .383. Don't even bother to remember this number, I promise I'll reduce this to a single calculation by the time I finish. Again, assuming we're trying to create a diamond with 6" edges, the base of this triangle is 6 times .383, or 2.298 inches. However, that is just half of the width of the diamond, so we need to double it to 4.596.

Now we know what we need to create a 45-degree diamond, since the process is the same as a 60-degree diamond. We need a starting square that measures 4.596 across the diagongal. We already know
how to do this, just divide this length by 1.41, giving a starting square of 3.26 x 3.26. Cool!

Now for a little trick. Let's do this calculation for a diamond with 1" edges. Going through the process again, we end up needing an initial square of .543" x .543". This is my second magic number! Larger diamonds will scale up directly from this 1" size. Multiply 6 by .543, and you get 3.258....the same size we
calculated using the long method!   Again, you might find it handy to create a table of starting sizes for common diamond dimensions rather than redo the calculation each time.

When you stretch the 45 degree triangle to size, the rotation angle displayed in the Graph Pad will read 67 this time. To build a star from this, you need to make copies of the diamond and rotate to 0, 45, 90, and 135 degrees.

Ok, let's summarize the process:

  1. Pick the edge size of the diamond. If you want a 45-degree diamond, multiply that length by .543. If you want a 60-degree diamond, divide that length by 1.41.

  2. Set a square block on the layout using the Plain Block tool.

  3. Use the Adjust tool and Graph Pad to resize the block into square using the size calculated in step 1.

  4. Use the Graph Pad to rotate the block to 45 degrees.

  5. Using the top center resizing handle, drag the block until the height and width displayed in the Graph Pad are "close" to your target edge size.


You are now done. Since you used the Plain Block tool to set the original shape, you can now use the Set tool to drop any block into the diamond, and it will be reformed into a diamond shape. If you create a quilt using this process, you've just created a reusable layout like those in the Layout Library.

Here is a design I created in EQ5 using this process: 
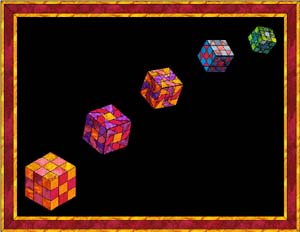


Friday, July 16, 2004

Triangular Blocks and EQ5

Time to vent a little frustration at EQ5. It turns out to be extremely difficult to design a quilt that uses triangular blocks in a regular layout. The typical recommendation is to use a Variable Point layout and use a block with a pair of triangles into the two block halves, separated by the diagonal of the square. Yeah, this works, sort of, but the process can be made much easier.

Of course, the first problem you run into is how large should I size the blocks in the layout? Unfortunately, this requires the use of the dreaded "M" word. That's right, MATH!

A little geometry is in order here. The ideal shape for a triangular block is an equilateral triangle (one where all 3 sides are the same length). If you take an equilateral triangle, stand it up on one side, and draw a line from the middle of the base up to the top point, you have divided the equilateral triangle into a pair of tiangles called 30-60-90 triangles. A 30-60-90 triangle has some special properties, geometrically speaking. The hypotenuse (the slanty part as you are looking at it), is twice as long as the short leg (the one it is standing on....the part you split in half drawing the line). So, if you start with an equilateral triangle with 8 inch sides, and do the split like I said, the short leg will be 4 inches. That only makes sense, since you created it by splitting an 8 inch side in half!

Well, that's mildly interesting, and mostly useless . However, the other property is the length of the long leg (the one you drew). This leg will always be the square root of 3 times the length of the short leg. Huh? Ok, let's simply this, and use a magic number. The square root of 3 is 1.73205080756588772935274463415059....,
but for practical purposes, you can use the value 1.73, and, frankly, for many quilting purposes, you can use the value 1.75. That is "close enough" for real life applications.

Anyway, back to our equilateral triangle. If we want to create a triangle that is 8 inches on a side, we divide the length by 2, and multiply by 1.73. This gives us a height of 6.92 inches for the block. If you use the value 1.75, rather than the more accurate 17.3, the size becomes 7 inches. Note that this is only off by .08 inches. that is less than 1/12 of an inch, or 1/3 of 1/4 of an inch. Most quilters vary their quarter inche seam allowances by more than that margin, so the 1.75 number works very well.

Ok, back to my quilt layout. To create a variable point layout, I need to give the width and height of a diamond shape, not a triangle or square. So what size to I need? Well, the diamond is two of my equilateral triangles stacked base-to-base. We already know that this is 8 inches across the base, so my block width should be 8 inches. We've already calculated the triangle height at 7 inches, so my block height needs to be 14 inches. Voila, that part is done.

Of course, now we ask the obvious question: Why doesn't EQ allow me to ask for this automatically! Think about this a second....I had to use a calculator to tell the computer how to figure out something very common. Why doesn't EQ do this for me?

Ok, that is the easy part. The hard part of this process is yet to come. In order to get this to work, I need to create a block that contains a pair of triangles. when this block is set into the variable point layout with the proper rotation, EQ will distort the block into a diamond, making look like you actually using triangles. You can find an example of how to do this here.

This works "ok" if your block is very regular and is constructed mostly from straight lines or boxes. It can be somewhat mind boggling trying to picture the distortions, but the partition tools come in very handy for figuring out where nodes can be positioned. It gets even worse if you want to use curves.

Ok, time for another rant: Why can't I partition the edges of the blocks into nodes? I can parition any line I draw in the block properly, but I can't do this along the edges, which makes positioning very difficult. If you try to draw a line along the edge, it disappears so you can't select it....I've also found this to be an invitation to cause EQ5 to hang or crash when you save to the sketch book :-(

I have tried drawing a triangle block, to get the proper shape (using my magic 1.73 times the base formula). Once you have a triangle that looks the way you want, select all of the lines, duplicate the lines. Rotate the duplicated block by 180 degrees, and position it against the base of the first block to create a diamond.

Now you have a diamond, which we need to convert into a square block. This is where the process becomes painful, since I've found that you really need to use a secondary tool like CorelDraw to help in the process.

I made an attempt at doing this entirely in EQ5, with fairly disastrous results. In thoery, you should be able select all of the lines in the diamond, "squeeze" the top and bottom into a square, rotate 45 degrees to line up with edges, and then stretch the square out to the size of the block. In theory, practice and theory are the same. In practice, practice and theory are never the same! Without fail, saving this created block to the sketch book crashed EQ5. It was also very difficult to get the first "squeezing" process to create a correct square.

For this part of the process, I turned to CorelDraw. By drawing this block in CorelDraw, it proved possible to draw the diamond and created the skewed block drawing. I then saved the CorelDraw drawing as a bitmap, imported the bitmap into EQ5 as a tracing bitmap. Once it was resized to the block size, I then traced over the lines of the square to created my block.

In the case of the block I was trying to create, I needed to have some curved pieces in the block. When reshaped into a square, the curves ended up quite distorted from the orginal curves, so the tracing process in EQ5 required a bit of poking and prodding to edit the curves into the shape I was trying to trace over. However, when this was set into the variable point layout, these nicely warped back into the smooth curves I started with.

Time for another rant: Why doesn't EQ5 directly support creating triangle blocks or a diamond shaped drawing board setup?

First blog

This is my first blog entry on my new blog (I know, redundant). I'm creating this blog for the purposes of sharing and collecting my thoughts about my hobby quilting. I'll be dicussing various issues of designs, and sharing how to tips on using Electric Quilt (and the occasional rant!).

Pictures of quilts I've made, and various designs I'm working on in EQ5 can be found here.

Anyway, here's a picture of my most recent finished quilt, which will be a gift for my sister Shirley: My Sister's Back Yard. Shirley lives in Alaska in a log cabin overlooking the Matanuska Glacier, about 100 miles from Anchorage. This is essentially the view from their living room window, albiet from a different view point. Their cabin would be to the left and elevated a bit so that they're looking down on the glacier. This was created from a postcard Shirley sent me. I'm going to be delivering this in person in another week, so perhaps I'll get the opportunity to take some pictures of my own that will turn into a quilt too.

This was my first attempt at a landscape quilt. I did this as part of a QuiltUniversity.com class taught by Susan Brittenham. These were a lot of fun, and much easier than you might imagine. I made great use of computer technology to assist in this attempt. I'll try to write up some of the things I did so others can learn from my experiences.

Well, that's enough for now, since I'm not even sure I have the blog setup configured correctly. Let's see if this actually posts!